Redecorating your home doesn’t have to be expensive or time-consuming. With a little creativity and some simple DIY projects, you can refresh your space and make it more personal, cozy, and stylish. Whether you're a seasoned DIYer or just getting started, these ten easy home decor ideas will inspire you to transform your space without breaking the bank. Let’s dive into the first section of projects you can start today!
Unique and Functional DIY Projects to Refresh Your Space
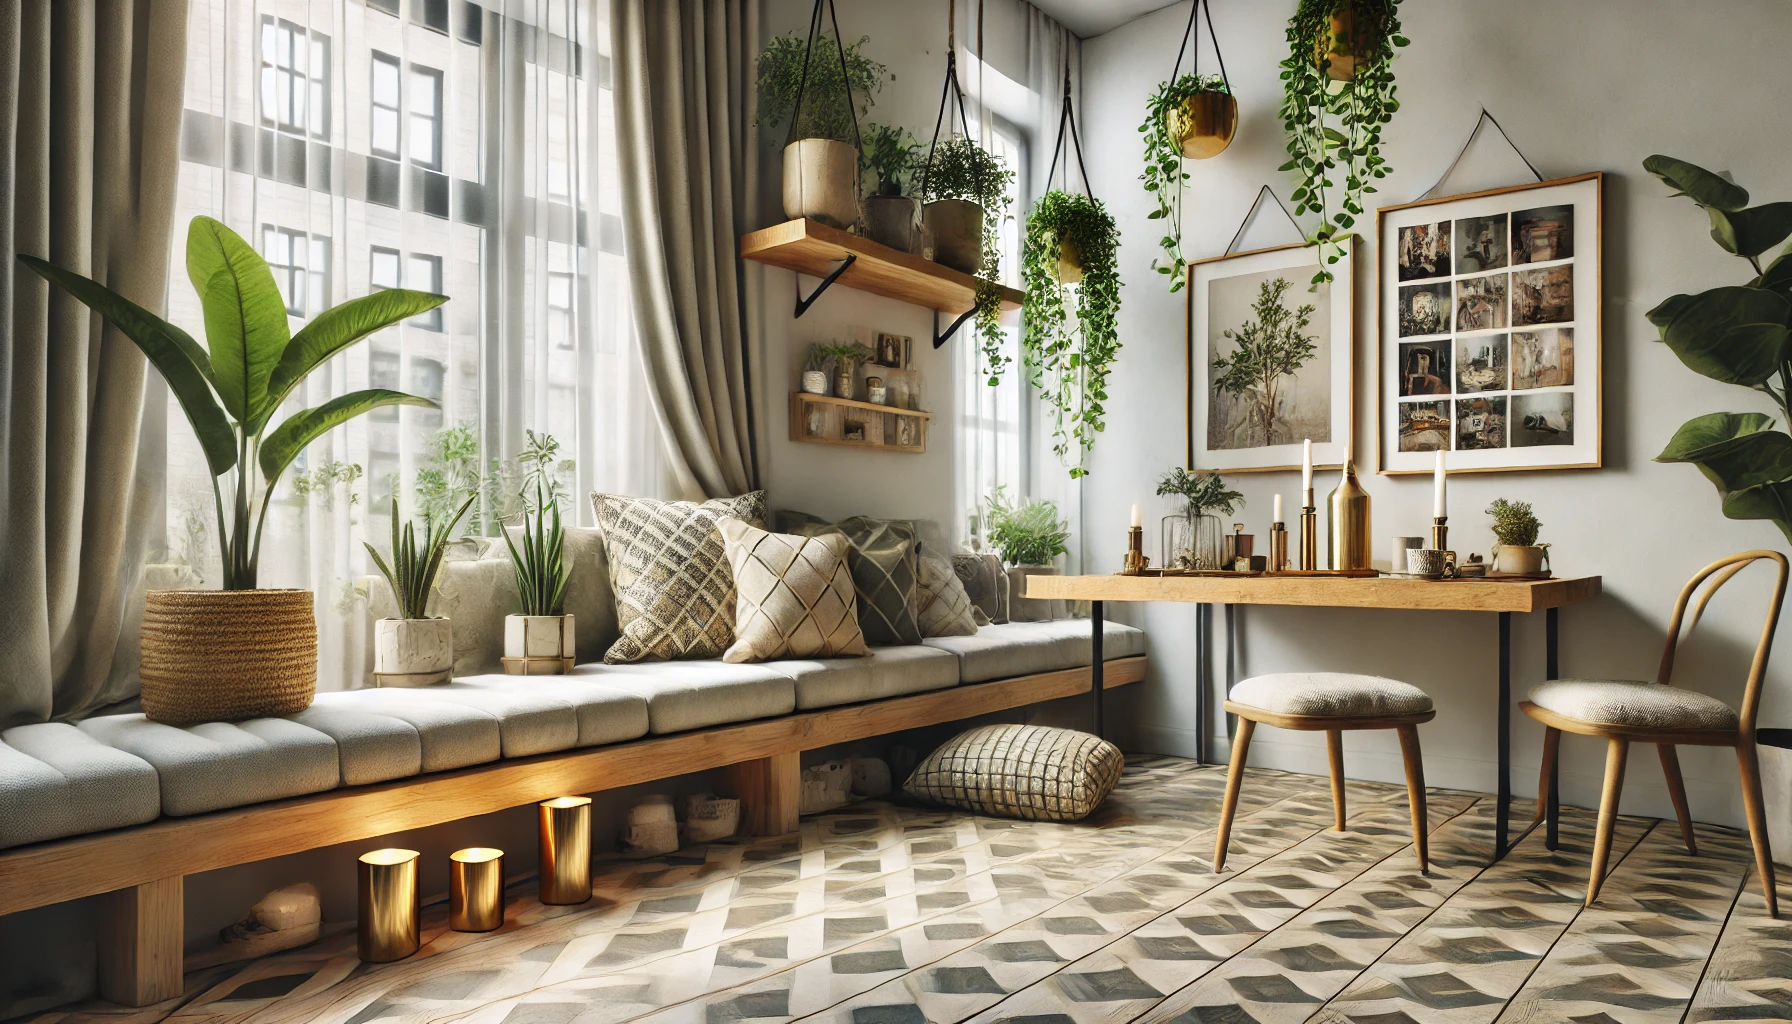
1. Live Edge Shelf – A Natural Focal Point
One of the easiest ways to create a beautiful and functional space is by installing a live edge shelf. Live edge wood, with its natural curves and textures, adds warmth and character to any room. This project is perfect for displaying plants, books, or decor items while giving your room a rustic and stylish touch.
What you’ll need:
A live edge wood slab (choose one that fits your desired space)
Floating shelf brackets (available in DIY kits)
Drill and screws
Sandpaper and wood finish (optional)
Steps:
Start by sanding the wood to smooth any rough spots.
Apply a wood finish to protect and enhance the wood’s natural beauty.
Measure and mark the wall where you want to place the shelf.
Install the floating shelf brackets securely, making sure they are level.
Place the live edge shelf on the brackets, ensuring it is stable.
This project is simple but makes a big impact, turning an empty wall into a striking focal point. For more detailed instructions, check out resources like Good Housekeeping’s guide to DIY home decor ideas.
2. Floral Candlesticks – Add a Touch of Elegance
For those who love a personal touch, floral candlesticks are a great way to add elegance to any room. By painting simple floral designs on plain candlesticks, you can instantly upgrade their look, making them perfect for dinner parties or casual gatherings.
What you’ll need:
Plain candlesticks (wood or ceramic work best)
Acrylic paint or paint markers
Small paintbrushes
Steps:
Clean the candlesticks to remove any dust or dirt.
Use acrylic paint or paint markers to create floral designs. Feel free to get creative with colors and patterns that match your home’s aesthetic.
Let the paint dry completely before using the candlesticks.
The beauty of this project is that it’s simple yet allows you to add your own unique artistic flair. You can customize the colors and designs to match your decor theme, whether it’s modern, rustic, or vintage.

3. Egg Carton Flowers – Eco-Friendly Whimsy
If you’re looking for a fun and eco-friendly project, egg carton flowers are a great way to upcycle old materials into charming decor. These flowers can brighten up any room and are perfect for adding a whimsical touch to your living space.
What you’ll need:
Empty egg cartons
Scissors
Acrylic paint
Glue
Twine or floral wire (optional)
Steps:
Cut the egg cartons into flower shapes. You can get creative with the size and style of each flower.
Paint the flowers in bright colors, adding layers or patterns for extra depth.
Once dry, glue the flowers onto a wooden dowel, twine, or floral wire to create a bouquet or garland.
This DIY project is perfect for a weekend afternoon and adds a playful touch to your home. Plus, it’s an excellent way to recycle materials, giving them a second life in a fun and creative way.
4. Hanging Photo Collage – Display Your Memories
Create a personalized hanging photo collage that showcases your favorite memories while adding a decorative element to your walls. This simple project allows you to switch out photos whenever you like, making it a versatile piece of decor that can be updated with new pictures or seasonal themes.
What you’ll need:
A wooden board or branch
String or twine
Clothespins or small clips
Photos
Steps:
Attach the string or twine to the wooden board or branch, leaving enough space between each strand to hang photos.
Use clothespins to clip your favorite photos onto the string.
Hang the board on the wall and adjust the photos as desired.
Not only does this project add a personal touch to your home, but it also allows you to change out photos easily, keeping your decor fresh and meaningful.
5. No-Sew Window Seat Cushion – Cozy Comfort Made Easy
Transform a plain window seat into a cozy nook with this no-sew window seat cushion project. It’s perfect for anyone looking for a quick and easy way to add comfort and style without having to sew.
What you’ll need:
An old cushion or foam padding
Fabric (choose a pattern that complements your decor)
Fabric velcro
Steps:
Wrap the cushion or foam padding in the fabric, folding the edges neatly to create a clean look.
Use fabric velcro to secure the fabric in place, making sure it’s snug and wrinkle-free.
Place the cushion on your window seat, and you’re done!
This DIY project offers a simple and budget-friendly way to refresh your space while adding a touch of comfort. Best of all, it’s easy to switch out the fabric whenever you want to change the look.
6. Gilded Candle Holders – A Touch of Gold Elegance
If you’re looking to add a touch of glamour to your home, gilded candle holders are the perfect project. This simple DIY turns plain glass jars or thrifted candle holders into chic, golden decor pieces that catch the eye and add warmth to any room.
What you’ll need:
Plain glass jars or candle holders
Gold leaf or gold leaf paint
Adhesive glue for gold leaf
Soft paintbrush
Steps:
Start by cleaning the jars or candle holders to remove any dust or residue.
Apply adhesive glue around the base or wherever you want the gold leaf to stick.
Gently apply the gold leaf using a soft paintbrush, pressing it down lightly to adhere to the surface.
Once you’ve covered the desired areas, brush off any excess leafing, and allow it to dry.
This project adds instant sophistication to your home decor. The reflective, gilded surface pairs beautifully with candles, creating a soft glow that enhances the overall ambiance of your space.
7. DIY Sponge-Painted Wallpaper – Create a Custom Look
For those who want to make a bold statement without the cost of real wallpaper, DIY sponge-painted wallpaper is an easy and creative alternative. This technique allows you to design your own wall patterns using simple tools and your favorite colors, adding character to any room.
What you’ll need:
Kitchen sponge (cut into desired shape)
Paint in your chosen colors
Painter’s tape (optional for design precision)
Paint tray
Steps:
Prepare your wall by cleaning it and taping off edges to create clean lines.
Pour your chosen paint into a tray and dip the sponge in lightly.
Press the sponge onto the wall to create a pattern. You can repeat the same shape or mix different shapes for a unique design.
Allow the paint to dry and remove any painter’s tape for crisp, clean edges.
This project is a budget-friendly way to add texture and personality to a room. You can experiment with different sponge shapes and colors to create a truly one-of-a-kind design.
8. Straw Hat Display – Functional Art for Your Walls
If you’re a fan of boho or rustic styles, why not turn your straw hat collection into functional wall art? This simple project allows you to showcase your hats while also adding texture and charm to your walls. It’s a great way to decorate without spending money on new decor items, using what you already own in a creative way.
What you’ll need:
Straw hats (the more variety, the better)
Command hooks or small nails
Measuring tape
Steps:
Decide on a layout for your hats. You can arrange them in a straight line, grid, or an abstract pattern.
Use the measuring tape to ensure even spacing between the hooks or nails.
Attach the hooks or nails to the wall, then hang your straw hats on them.
This project not only adds visual interest to your walls but also serves as practical storage for your hats. It’s a win-win that brings both function and beauty to your home.
9. Teak Wall Tiles – A Spa-Like Bathroom Refresh
For a high-end look with minimal effort, consider adding teak wall tiles to your bathroom. Teak’s natural, moisture-resistant qualities make it perfect for creating a spa-like atmosphere. This project transforms your bathroom into a soothing oasis without the need for a full renovation.
What you’ll need:
Teak wall tiles (available in packs at hardware stores)
Tile adhesive
Measuring tape and level
Tile spacers (optional)
Steps:
Measure the area where you want to install the tiles to ensure you purchase enough material.
Apply tile adhesive to the back of each tile and press it firmly onto the wall, using a level to ensure straight lines.
If needed, use tile spacers to keep the gaps between tiles consistent.
Allow the adhesive to dry before cleaning any excess with a damp cloth.
Teak wall tiles bring warmth and elegance to your bathroom, giving it a fresh and modern look. This project is relatively simple, yet the results are luxurious and spa-like, perfect for anyone seeking a tranquil retreat at home.
10. Hand-Painted Floors – Custom Art Beneath Your Feet
For the adventurous DIYer, hand-painted floors offer a unique way to personalize your home. Whether you’re looking to refresh old hardwood floors or make a statement in your entryway, painting a pattern like checkerboard or stripes can add character and creativity to any room.
What you’ll need:
Floor paint in two contrasting colors (such as black and white for a checkerboard design)
Painter’s tape
Measuring tape
Paint roller and brush
Steps:
Start by cleaning and sanding the floor to prepare it for painting.
Use painter’s tape and a measuring tape to mark off the areas where you’ll apply each color. If you’re painting a checkerboard, make sure to measure evenly for perfect squares.
Apply the first color of paint to the selected areas using a roller, and let it dry.
Once dry, remove the tape and reapply it for the next color. Repeat the process until your pattern is complete.
Seal the painted floor with a protective topcoat to ensure durability.
This DIY project is bold and artistic, perfect for those who want to make their home truly unique. The painted floors will instantly draw attention and become a conversation piece among guests.
Conclusion: Transform Your Home with Simple DIY Decor
In conclusion, DIY home decor projects are a fantastic way to breathe new life into your space without spending a fortune. With just a few supplies and a little creativity, you can transform any room into a cozy, stylish retreat. From adding a natural focal point with a live edge shelf, to creating an eye-catching hanging photo collage, these projects allow you to express your personal style and make your home truly yours.
The key to a successful DIY home decor project lies in simplicity and creativity. Even if you’re new to DIY, these easy projects offer a fun and rewarding way to enhance your living space. Plus, the ability to personalize each project ensures that your home reflects your unique taste.
And once you’ve completed your projects, regular maintenance will help you preserve their beauty and functionality, keeping your home looking fresh and inviting. Whether you’re painting floors, updating a cushion, or caring for your wall tiles, these small efforts will go a long way in ensuring your DIY decor remains in top condition.
So, what are you waiting for? Pick one of these 10 DIY home decor ideas and start transforming your space today. Your dream home is just a project away!